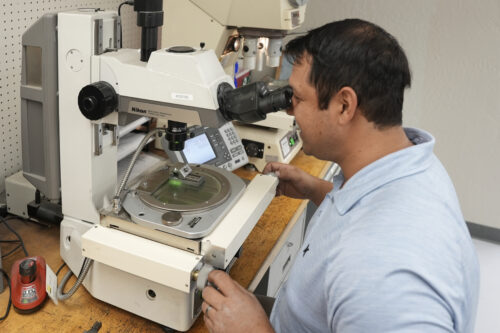
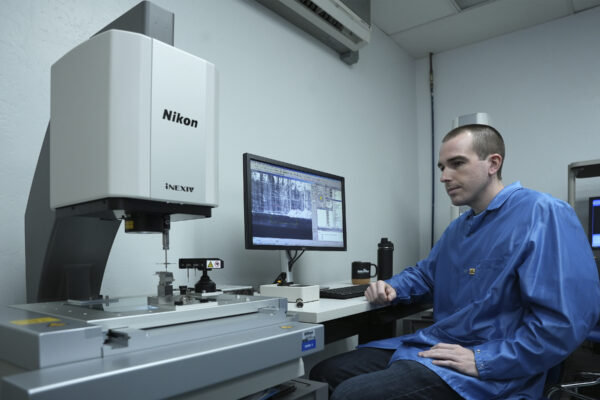
Nikon’s iNEXIV VMA-2520 video measuring system – the company’s latest addition to its industry-defining metrology solutions – has empowered IntriPlex, a global leader in metal-stamping technologies, to achieve its ambitious output targets while ensuring that components adhere to customers’ stringent quality inspection requirements.
California-based IntriPlex designs, develops, produces, and sells high-quality, critical-to-function mechanical component solutions for some of the world’s most technologically demanding applications. Since its founding in 1987, IntriPlex has maintained a two-decade partnership with Nikon Metrology, reaping significant benefits from utilizing Nikon’s iNEXIV line.
The demand for quality video measuring and automated inspection
High-tech, high-volume manufacturers working in today’s most advanced industrial sectors cannot rely solely on efficiencies and significant levels of throughput to ensure world-class quality. To execute at exceptional levels, many of these organizations must also deliver components in amounts far exceeding one million units per day with minimal levels of waste and at an acceptable rate of reliability. To accomplish these ambitious goals requires unparalleled metrology hardware and inspection software solutions that are rapid, reliable, and repeatable.
One of IntriPlex’s key new initiatives involves the stamping of battery components for electric vehicles (EVs). This project offers impressive long-term prospects, buoyed by support from consumers and governments worldwide advocating for the transition from combustion engines to EV technology.
There are three main form factors for the batteries in this space, and two of them use stamped components. It has proven difficult for the EV industry to find suppliers that are experts at precision stamping and capable of very high-volume production. This represents a unique opportunity for IntriPlex.
Metrology as a force multiplier

Nikon’s hardware and inspection software act as force multipliers for IntriPlex, providing exponential improvements across the business.
“Nikon Metrology vision systems and optical inspection systems have helped inspect IntriPlex’s stamped components for more than 20 years,” says Andy Stults, Director of Marketing for the Americas at Nikon. “It’s a tribute to the long-term quality and reliability of our products and service, as well as the great partnership we have developed with the team at IntriPlex.”
With new projects ramping up quickly and demand for throughput and precision higher than ever, the time was right to introduce the iNEXIV to the business, where the benefits were numerous and readily apparent.
“The iNEXIV VMA-2520 enables us to use dual-sensor technology—the touch probe as well as the vision system,” says Ryan Schmidt, Senior Director of Operations and Engineering at IntriPlex. “We need high-accuracy and high-resolution dimensional inspection software to establish our measurement capability, statistical process control, and overall process capability.
Schmidt continues: “Our stamped components have specific critical dimensions that we measure during development, in-process inspection, and final assessment before and after final processing operations, such as de-burring, special cleaning, and heat-treat operations. We leverage Nikon’s metrology tools to ensure our compliance with customer requirements and to establish best-in-class process capabilities that differentiates IntriPlex from others in our space.”
Enhancing Stamping and Battery Manufacturing Inspection with Nikon’s iNEXIV Vision System
The need for a better vision system
Another critical process now handled by the iNEXIV VMA-2520 is the measurement of cross-sections. IntriPlex once carried out inspections of this nature on an optical comparator but using the iNEXIV VMA-2520 allows for greater repeatability and reproducibility between operators. This inspection process allows the displacement of the legacy comparator, resulting in heightened accuracy and improved throughput.
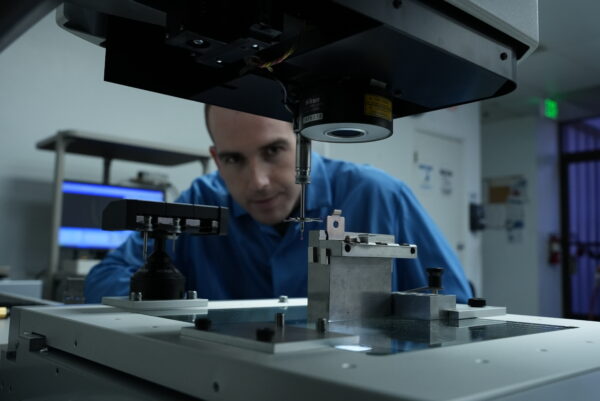
“Our decision to transition to the iNEXIV VMA-2520 was primarily driven by our need to perform 3D measurements on complex components with edges and surfaces rotated away from the primary view, which proves challenging for a standard vision inspection system,” Schmidt explains. “Adding a touch probe or laser coupled with the very capable vision system allows us to inspect parts of this type. This is a key factor driving the adoption of a multi-sensor solution like the iNEXIV VMA-2520.
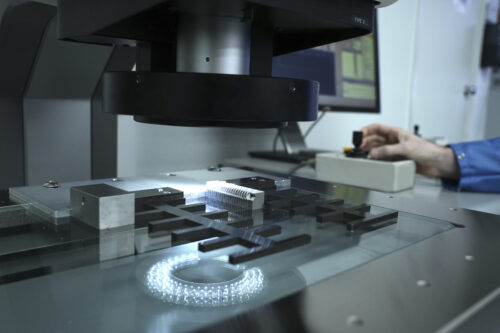
“Additionally, advanced lighting technologies provide us with significant advantages,” says Schmidt. “Nikon’s lighting innovations enable us to measure features such as counterbores that were formerly difficult to assess. This technical advantage strongly favors Nikon.”
Schmidt and his team have come to rely on Nikon’s outstanding reputation for training and support regarding their hardware systems and inspection software.
“The support from Nikon is key for us,” says Schmidt. “Figuring out new datum structures and approaches for the best and most efficient measurement methods is important. Our quality engineer, Brian Williams, reaches out to Nikon regularly and has never failed to get outstanding support.
“The CMM-Manager software package is a big advantage as well. It’s a well-established and capable software that is streamlined and respected in the industry,” he explains. “We will soon participate in training sessions to maximize our proficiency with the iNEXIV VMA-2520 and its associated software.”
The stamping state of play
The stamping of metals to create multiple parts quickly has a long history—for example, the mechanical production of coins through stamping goes back centuries. Today, metal stamping involves presses and dies to produce identical components on an industrial scale.
“An important thing to know about component manufacturing is that if you can stamp something, you should,” says David Dexter, President and CEO of IntriPlex. “It is the most economical way of manufacturing because you can stamp multiple parts per second, whereas with machining, you are likely limited to multiple seconds per part even at its most efficient.”
IntriPlex has successfully stamped components for customers in a range of industries over the years, with hard disk drives being a business mainstay. However, they are currently working on growth projects in two emerging areas. Batteries for EVs are one of these with immense potential. The other is fiber-optic connectors, which have traditionally been machined.
IntriPlex is the first company to develop a process for stamping these connectors, which bolster much of the communications sector.
The IntriPlex differentiator, and the reason why the company is a global leader in the field, comes from their mastery of the most complicated metal-stamping process: forming. Most companies in this space can adequately cut, bend, or punch basic metal components. However, reliably forming large quantities of generally small parts featuring complex internal and external geometries requires enormous ingenuity, precision, and repeatability.
For IntriPlex to achieve this consistent level of precision, a flexible, multi-sensor inspection software solution was needed to handle a wide variety of stamped components, each with multiple technical features.
The best work with the best
“To create truly world-class products, it is imperative to determine their superiority,” says Dexter. “And so, the measurement capabilities that Nikon provides us are of paramount importance in maintaining our leading position in the industry.”
For over 35 years, IntriPlex Technologies has leveraged its engineering-focused process of excellence to establish a prominent position in the global metal-stamping industry. Through the years, Nikon Metrology has been a steadfast partner, helping the IntriPlex team improve throughput and quality hand-in-hand. As fresh opportunities arise and new technologies emerge, these two industry leaders persist in their collaborative efforts.
Technological advancements require manufacturing companies to be attentive to present and future opportunities. The shared commitment to challenge themselves and grow in service of their customers is a defining characteristic of IntriPlex and Nikon, underpinning their cultural alignment. The fruits of this partnership are evident in IntriPlex’s distinctive capability to stamp increasingly higher volumes of components with enhanced quality. Likewise, Nikon’s dedication to advancing metrology systems with improved visual inspection capabilities reflects their commitment to aiding IntriPlex in fulfilling its mission. Together, IntriPlex and Nikon forge ahead, shaping the future of precision engineering and setting new standards for exceptional products.
