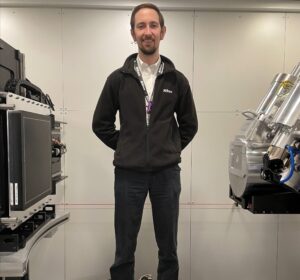
Today we spoke to James Finch, Applications Engineer within the X-ray Business Unit, about his responsibilities and his expertise with the Contract Inspection Bureau.
Hi James, could you please tell us what are your individual responsibilities within Nikon Metrology?
As an Applications Engineer within the Contract Inspection Bureau, I provide non-destructive testing using our range of X-ray CT systems. We provide this service for individuals or companies that either don’t have enough demand to buy an X-ray system themselves; have surplus demand for a system they do own; or simply cannot inspect parts with the current system(s) they have (for instance- needing to inspect a large sample, but do not own a Large Envelope System).
I also provide system training internally within our company to introduce new hires or give refresher courses to staff that don’t regularly use our systems but want to keep updated with our product range.
What are the best parts of your job?
The best part of my job would have to be the insights I get into the wide range of industries we do work for (anything from geological to Formula 1); which also means that I can be doing work on completely different samples from one day to the next.
Another aspect of the job is that being integrated with some customer’s production and development we see how our service/CT benefits our customers and enables them to improve their own products/services.
Any anecdote that you would like to share with our readers?
Whenever we get a new type of sample through our service I make sure to ask what the part is and how it fits into the rest of the (for example) car. Some of the time it’s just interesting to know the context of the parts we’re scanning; but then there are the other times where it leads to a deeper conversation of the part involving (e.g.) the processes to make it and helps us for future inspections in knowing the kind of features (or defects) to look out for.
These conversations often lead into discussing the full range of systems we offer and the techniques we can use for CT scanning. Most commonly we have customers in for standard circular CT, but after some discussions also recieve taller samples using our X.Tend technique for future works.
Could you please tell us what benefits the customers can expect from using X.Tend Helical CT?
We benefit from using X.Tend Helical CT in the Contract Inspection Bureau as we can scan parts that are long in one axis but achieve the scanning resolution depending on its shorter axis; which enables us to scan parts with a high aspect ratio at a much higher resolution than with standard circular CT; in addition to avoiding the artefacts caused by parallel surfaces, the cone-beam geometry of the X-rays in CT scans, as well as not encountering the stitching artefacts that can appear in other techniques since it is one continuous acquisition.
Furthermore, with X.Tend scans are faster without sacrificing resolution (compared to Filtered Back Projection (FBP) or Iterative methods) as we can use a large pitch angle and therefore need to acquire less projections for the scan.
Our method also does not introduce the severe artefacts seen in FBP while being much faster to reconstruct than Iterative methods enabling us to achieve a much higher throughout of parts/faster acquisition, which is ideal for the Contract Inspection Bureau.
What sectors & industries can benefit from using it?
We have used X.Tend for most industries with large benefits over circular CT. One industry that especially benefits from X.Tend is the battery sector since imaging the internal features requires high resolution while the batteries themselves generally have a high aspect ratio, so are ideal for the technique.
As a Nikon Metrology expert, what is your favourite system feature & why?
X.Tend Helical CT is a fantastic and essential tool we use constantly in our scanning works. It enables us to inspect certain parts much easier than using circular CT since rather than having to do multiple normal circular CT scans and go through the process of stitching the individual scans together (which can be very time consuming), we can do a single X.Tend scan which won’t suffer from the field of view or parallel surface related artefacts and it will be quicker to obtain the final CT data. Furthermore, it enables us to use the Large Envelope systems to greater effect since the system enables us to scan parts that are ideally suited to X.Tend due to its large range of motion in the Y-axis, as well as its large maximum sample size (in both height and width of sample).
